Wednesday, 28 May 2014

2 new designs for the Wildlife collection Flying geese and Gone fishing


what is this weather like!!!!!! .......still at least is has enabled me to carry on with some designs I have been working on and some samples of these....  today 2 for the wild life collection Gone fishing with The Kingfisher and Flying geese, both coloured using Copic Pens , and using Nestiblities for framing and the greetings , I have actually used and old Magenta rubber stamp that i have had a number of years and find very useful for swirly corners..


I'm going now to finish another 2 from ' It's a Man's world ' and will post them soon and if this weather keeps up very soon .... thank you for poping by see you again soon ....Jayne x

Tuesday, 8 April 2014

Painter's Shelf,Wood Work Bench and In the Shed....


Hello everyone today  we have some new designs completed, with cards made and avaliable now..I founf that Probably men's card are the most difficult to find or at least images that could be used , so I drew some....... these are part of the 'it's a man's world collection'... there are so many in my head just need a little while to get them onto paper .....

 Painter's Shelf, On this one i have choosen to keep the background simple just by stamping a swirly pattern to match the colours,Main Images coloured with Copic Pens.The greeting from the greetings sheet, and die cut using one of the nestie dies.
 The Wood Work Bench again Coloured with Copic pens and and a swirly stamp for the back ground
In the Shed reminds me of those cluttercards you could get a while back.... and as most gardeners have a shed this would be great for both Male and Female Birthday cards, Coloured the same way, layerd certain elements to give a bit of demension, greetings from the greetings sheet, using different dies,

thank you for popping by  see you soon Jayne

Tuesday, 1 April 2014

Meet the Bluetit family

Good evening everyone , Sorry for no posts lately been a bit tied up with one or two things ....Tonight I'm showing you one of my latest designs Blue Tit Family. Actually taken from a watercolour I've been commissioned to do and you will see that over on the Art Blog ..soon


 I managed to re size this to a 7 x 5 card and was given to my Mother on Mothering Sunday last week
 It would work equally well as a Easter card which was ask for recently...
 This is the smaller version with just two babies and works well on a  6x6 square card for Easter
 For Birthdays
 And another version for Birthdays all coloured with Copic pens layered as much or as little to suit.


On a sad note I made this card for a very special friend who lost her Husband last week to Cancer, Colin was also a close friend of mine and I shall miss him, I am going to be away for the next 5 days to spend some time with Carole so I won't be blogging probably not until the end of next week. so until then enjoy this weather and I'll see you soon....

Happy Crafting Jayne x

Friday, 21 March 2014

Take off and Inflight another 2 designs completed....


With this wonderful weather we are having I have been very busy at the allotment digging maily, everything seems to be growing well the fruit bushes budding up nicely, and the ruhbarb up in great force, I lost very few winter onins and garlic this year , I put it down to the fact of the mild weather we had over winter,   

here is another 2 cards for the men in our lives.....


''Take Off''' a pheasant over bullrushes coloured with copic pens and nestie labels 2 for the mat and layering, also with a gun and old powder bag and horn very traditional
''In Flight'' same scene with Ducks these both are proving very popular with my customers, with or without the gun and bag ...


Great news!!! I have started the Art blog  http://arttechdesignstudio1.blogspot.co.uk/   follow the link or add to your favorites bar for easy reach , I have put the Studio build on there to start it off but it will be for the Arty side of my life .... pop across and have a look thanks

I will continue here with the cards and new designs as and  when they are released contact me for futher details ....

Happy crafting see you soon .....Jayne x

Thursday, 27 February 2014

One or two pretties tonight....


Hello ...I know another week gone, well nearly ....I'm in making card mode again...  with all the latest designs some you haven't seen yet...  am keeping them under wraps for a little while longer.. here are some pretties drawn from the art work I was kicking around mid of last year, using the same format with the nestie Dies and colouring with copics pens, I want to play more with these i can see butterflies and other flowers working in the same manner ... 

 lilacs and mauve's give a softer look although i have some coloured even softer  and layered more which i'll share once the cards are completed ..
This one again a smaller version to the art work done for the trip tic works really well shrunk and again because there is no border the nesties are the perfect companion... beads in the center of the flowers look great ,Actually the trip tic would work well as a Zig Zag card ummmm...

This next few weeks are going to be a little mad or rather madder than usual, I have so many things i need to get started, finished or prepped up ...I am working on  more of the out the frame looks either the shed  or green house for more of an ''in the garden ''look with wooden planters and hanging baskets oh yes and a ''trug o flowers'' just need to find the right back ground ...they look ok on their own too for a special thank you..  so i'll try over the weekend to get those completed .. and then there are more in the Man's World coming shortly....


I have also been given a commission in the art side of me  so will have to do a little more serious painting stuff, but I shall do my best to keep popping in and showing you the cards as they get completed till then


Happy crafting Jayne x

Friday, 21 February 2014

Where do the days go !!!!!


I can't belive it's Friday already ...I know I have had my head down drawing most of this week time has just flown by  ...I'm going to carry on with showing you some more of the new cards made which is all part of the designing trying things out and see how sizing works....on the 2 cards tonight you will see the backing from one was actuaklly cut for the matting layer on the other... I like this as you get not only two bases of card but also the greetings backing layer too.


This is how it's done I've used a pencil and drawn around the inside of the Nestie die in this case it was Lables 3. ok remove the die and you should see your pencil line. at this point colour the  background image and the seperate garden tools 2. decoupaging the pot and trowel more 3 times in all. leaving the trowel layer until later when you have attached the greeting in place, when it came to die cutting for the backing layer i thought if i cut it our of a piece  of card top left slightly not only would i have the mat layer but would also have a apt ready for another card by cutting around the pencil line it would then fit, then use a soft rubber remove all traces of the pencil. I then cut the greeting backing layer out of the center of the image backing. saves card all round...I've then simply stamped using an old magenta stamp swirls diagonal corners wrapped ribbon placed the greting over the ribbon then attached the trowel over the lot. ..note to self .must do some background designs to go with these ......

you can see here the other piece of card used as the apt laying green card behind the hole after stamping on the corners with pearlesent rust Brillance ink pad and then attaching this image in the garden with creeping vine , notice the lawn mower ... on this one you can't see, becuase this is a scan  but I've cut slots both sides and slipped the garden tools in them this creates a small bow of tools in the front and finshed the same way as before with the trowel last to go on,

I have to say the more I play with these print outs I can see that having all the elements seperated you can do vertually any thing and change the layouts to suit , each set then would have 3 main elements plkus extras the greetings or maybe 2 so we are looking at A5 size  not C6 like all the other   traditional decoupage style stamps.  Personally I prefer either red or grey Rubber Slapstick style stamps you get a much finer detail stamped image and they do last a life time if you look after them , but then saying that I like the clear as you can see where you are poistioning the image. esp when you are creating a picture with multiple stamping... and then there is Digi stamps will have to look into this more  ..... but I think you are tied to just set and print you can move images around and create a picture that way ... but with printing then you are tied to Copics, Pro markers or simular for colouring Although I have been playing with oil based and pastel pencils as well as pergomarno style but that will be next week...

enjoy your weekend  see you soon Happy colouring in........ Jayne x

Tuesday, 18 February 2014

one or two more cards to share..


Hi everyone, ok tonight I have another decoupage style card made  below, but over the last few days I've been doing a little design ing for embellishments add ons what ever you want to call them and some will end up on the sets to suit , so all this playing helps to create the set ....these add ons for these cards and for cards coming up as we move through the designing to the next stage by removing the decoupage frame and start playing around with the spellbinder nesstabilities frames and lable die cuts...this in turn opens up the canvas.... 

 Shed on leafy frame coloured with Copics and layered across the front, Using this (Pattern ) for these cards, makes it a little easier to get going and get  cards done...... as the working out what you are going to do is done , all you have to do is sit and colour in..I found that it was all greens and browns but you can add more colour  in the detail work , the trim on the hat or Gloves , and as long as you add a light and dark shading you can get great results very quickly, You could also add colour with the back ground papers and ribbons...
 Here is another that is similar to the sneaky peek the other day this time on the main image i dtrew in flowers, added a shrubbery to the back ground and a pot of tools as an embellishment , in the same (pattern but different background how different they look .....And I think you would get away giving this card to ladies as well as gentlemen..
ok lets move on again more  thinking out of the frame ... I've used Labels 3  on this card  both the largest for the main image and second up for the greeting and the back ground is now an Allotment, modelled on my own, unfortunately we don't have sheds but the rest is fairly close, if the weather ever gets any better I need to be getting on up there ...and soon it's march in 2 weeks ......By extending the back ground and adding a few extra veggies to the scene you could almost do the 3 growing season's even a winter scene at the allotment, for those winter birthday's...and as i now have 3 different garden tool ensemble's you could interchange to what you want ....I'm wondering whether these should be individual stamps or preset images like the decoupage and Allyson,thanks Allyson  has now suggested Digi stamps ...Me personally prefer stamps  red rubber, but do like the clear as you can see where your stamping if masking or just freestyle stamping , but I know there are others out there like the formal Decoupage style as it's contained  and all in one neat box .....Hey  why not all three  now there's a thought  let me know what you think.....

I've rambled on enough for today ...see you again soon  till then Happy Crafting    Jayne xx

Thurs or friday this week we will look a little closer at some more new  cards and more ideas I've managed to get onto paper, I find the more i explore a new concept the more I see that will work and the more detracted I get so if my posting is a bit hap hazard over the next weeks and months while the collection are getting together I hope the waiting will be all worth while..  what was it some one said  ''it will be alright in the end''  if it's not alright, then it's not the end.....lol xx very true actually

Ok so i hope you will continue to pop in and have a look and leave some comments, may be even some ideas you may like for that Man in your life  and could be part of this ''A man's world ''

see you soon

Friday, 14 February 2014

What a windy Day !!!!!


I have never  heard such gusts of wind on the windows around the house as i have heard today, and so loud ....appauling weather roll on the summer.
ok tonight we kind of pick up where we left off a couple more cards with a few quick changes Remember these are Drawings at the moment not stamps ...


 Here on the Allotment background we have garden tools 2 and leafy border coloured with watercolour pencils (no water used)  all images from the watering can to the pot and trowel have been layered up, Ribbon wrap from Fantastic ribbons .

 Shed Decoupage with leafy border and garden tools 2. coloured with Copics, this time I printed and extra hat and layered in ontop the pot now appears at the back...Gingham ribbon from Fantastic ribbons


 Next I have the Green house in the background with garden tools 3 and Flower border, I used an extra spade to link the greeting to the card, on the other side the watering can a glove were layered and have now added a water butt beside the Green house,


And here is a sneeky peek of where My designs are taking me,  there will be plenty more over the next weeks and months .....from ''It's a man's world'' Collection, hope you like and that you will pop back soon...
till then Happy Crafting   Jayne x

Thursday, 13 February 2014

At last some new card designs to show you

Good evening everyone, I hope you all are safe and well with all this weather we are having just lately, Sorry for taking a little longer than I had said , once I had got really playing , I found that I  also need structure for you all, to see the process,well tonight at last I can start showing you some new cards that I have been working on ,for the men in our lives although some of these would do for an active female Gardener just as well, People are always saying it's hard to do men's cards, I do tend to agree but I think it's because there really isn't much out there for men in the craft industry,there is dies thast would suit and stamps if your lucky to find them So time to get to the drawing board and come up with some fresh new designs images etc and if they prove popular then maybe we'll get some stamps made in the future but they will be very exclusive and unique, so bearing that in mind let get going ,tonight's selection are very similar to the Decoupage stamp style, in the fact they are drawn the same way, having a background a border and clutch of gardening tools to decoupage as much as you want, This seems the best place to start ....first of all i must point out that these are all hand drawn by me, scanned cleaned in the photoshop process, then I've printed out images to colour, colouring this time I have been restricted to either Copics and Promarkers and water colour pencils with out the use of water, in other words using them as blending pencils , this can be achieved by colouring softly in a circular motion and slowly and gradually build up the colour , as you will see Watercolour pencils give a soft Vintage feel to the image , Where as Copics and Promarkers give a strong fuller colour, The reason is that unless you have a lazer printer if any water goes any where near the printed ink it will bleed like crazy, I have to say there is another technique which we will do later in the year...

 Shed Decoupage Coloured with Copic pens and every layer has been coloured and cut out along the front of the card
 A mix of both Copics and Promarkers, used with the Green house but only from the watering can cut and layered, with the trowel added over the greeting here Happy Birthday
 This is slightly different from the first Green house aswell as the green house the garden tools are different across the front, as we continue through you will see  I have done other things with these tools across the front. Coloured with water colour pencils (No water), I am going to try the Polychromus pencils oil based with these next week I will be interested in the results...The hat pot of tools and trowel were layered.
And the last for tonight another shed  but this time with a different border flower rather thn leaves and the tools across the front another line up of tools, grass edgers, spade Trug watering can and gloves, again coloured with watercolour pencils this time the spade watering can and glove was layered,
I hope you have enjoyed the first of many new designs, over the next few weeks i shall be sharing with you alsorts of new ideas, designs and some new colouring techniques that will help you. As i said this really is a ''work in process'' anything can happen, and most probably will, so join me again tommorrow and I show you some more, I would love to hear what you think so please  feel free to leave your comments Many thanks Happy colouring in ....


Jayne  xx

Monday, 10 February 2014

Just one or two more days needed.....


Good evening everyone brrr isn't it chilly today ....I've had a bit of a hectic weekend and day today so I'm not quiet ready to share with you one of the new designer cards yet  ......the trouble is I keep changing items or layout for better effect,   so here are a few more of the cards available for 2014, using My Birds on a branch, Birdcages and Wild flower stencils a mix of backing papers and Sparkle medium some with puffa glitters for duo tone effects, and then finishing with a ribbon wrap and wire curls


with a little luck pop back tommorrow or wednesday, and you'll see the first of '' It's a man's world '' cards collection, till then Happy crafting   Jayne xx

Friday, 7 February 2014

Sorry getting caught up in the Design Mode....


Hi everyone sorry I've got caught in the 'design mode 'and while the ideas are flooding in I need to get them out of my head and onto paper , so here are a few more cards made so far in 2014 , to be getting on with,these designs are from the decoupage Stamp range I drew in 2012 spring collection, for Imagination Crafts  of which I  use all the time ....some of the colours have been distorted by scanning especially the red it is actually deeper than it looks below , again I tend to stamp a fair few out and have a session of colouring in a) the layer and b) the back grounds  so i have a few done of each image ready to start building the cards

Products used .

My Iris , Crocus and Snowdrop Decoupage stamp sets,
coloured with watercolour pencils.
back ground stamped with Brilliance pearlesent Thyme,
Ribbon wrap and bow some with wire


20 

21

22

23

24

Hope you all have good weekend I will try to get back over the weekend if not it will e monday and  I'll reveal the first of the new designs

Till the Happy Crafting Jayne x

Tuesday, 4 February 2014

A few more cards


Hello again, ok tonight's collection of cards are still from this years selection of made cards 2014,  again they are similar to each other  as some of them were created while demonstrating at the shows , rather than waste any of them, lots are ready for cards , by simply trimming them to fit the backing papers and adding ribbons and bows ,die cut greetings as  you saw last night , with insert pre printed, you can make lots in one go and use for birthdays, Anniversary's Thank yows the choice is yours... 

Products used 
My Stencils, Bird cages, Birds on a branch,and Dragonfly and Poppies.
Various colours of sparkle Medium from Imagination Crafts,
Various backing papers also from Imagination Crafts,
Ribbons  from Fantastic ribbons,
Nesties oval 's 

11

12

13

14

15

16

17

18


19


Some of these you may have seen before here but I've redone more as they are very popular ..
I am continuing the new designs today I have managed to semi completed another .... Game shooting in mind very seasonal !!! see you again tommorrow with some Decoupage style cards... 

till then Happy Crafting   Jayne xx 

Monday, 3 February 2014

Where did January go !!!!!


Hello everyone, Where did January go !!!! ...I have been in 'Making Card mode' and 'Design mode', so have been a busy bee making cards as many as possible in a shortest time some of which I'll share in a moment ....

During making these cards i found I have ample images and bling and ideas for women but sadly lack in the Men's area.....yes i have a few stamps with men in mind, but nothing that i would call current so ...on went my 'Design Head'  and have been working on them for the last 2 or so weeks, they are all hand drawn for the Men' in our lives The painter , The gardener and The Carpenter. along with some everyday type designs that i hope you will like , these are leading now to a collection and I have soooo many ideas that would work this way could I' ve a whole new concept, I just need a little more time ( this week ) to do some colouring in and make the cards and play with die cuts to go with etc etc  and then I shall share them with you...

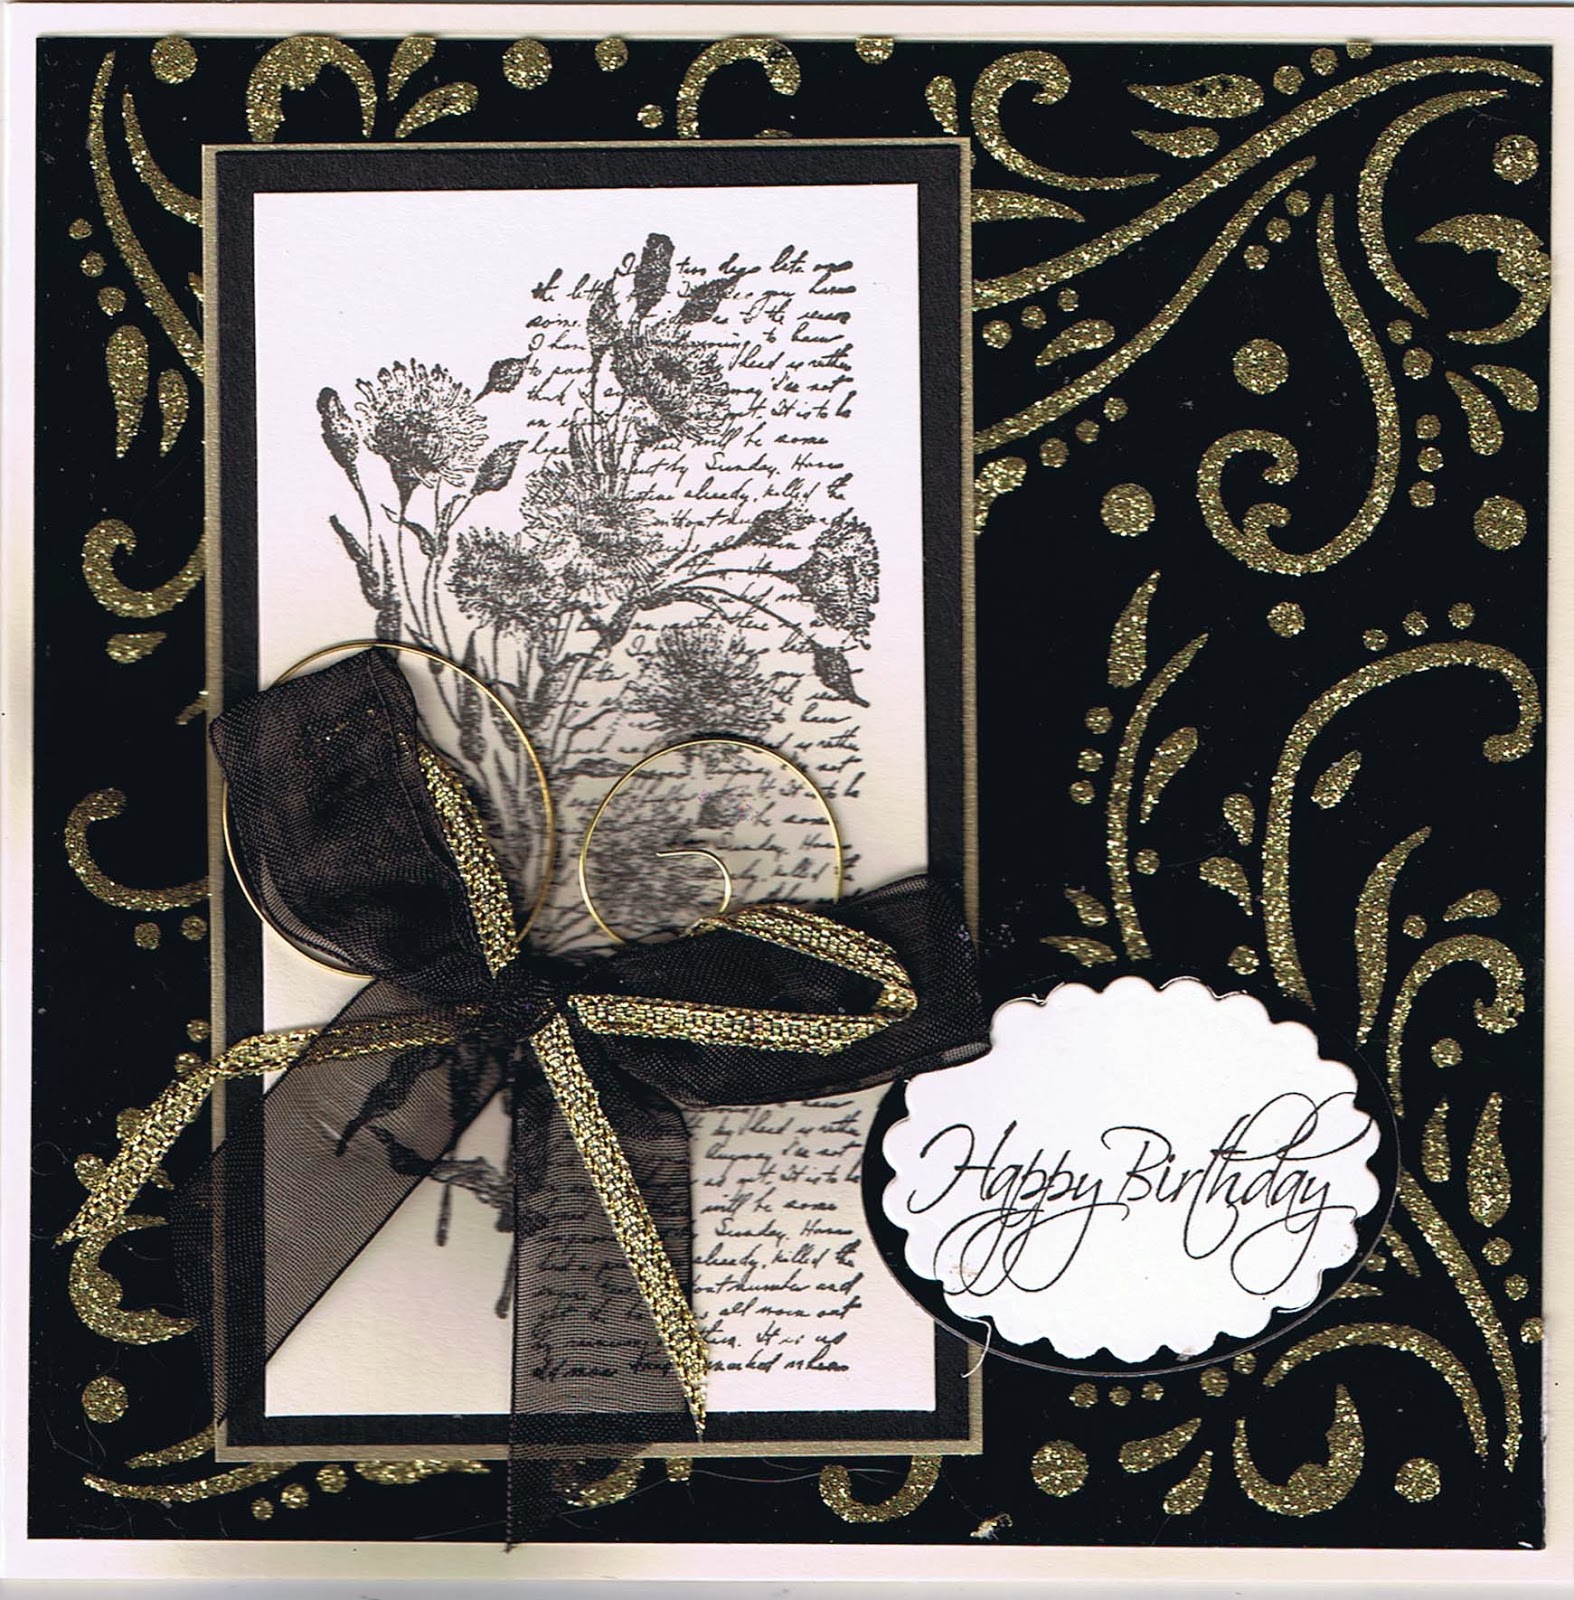
so until then here are some of the cards i've finished off....yes some are very similar but using different colours or back grounds and greeting you can achieve quick and easy beautiful cards .. the trick is to do at least 6 of each at the same time , so your prepping day is when you do all the back grounds whether they are on acetate or card then allowing them to dry,  while you get on with  all of your images (I do some extras just in case...) stamp all your images trimming and layering them as you go and then die cutting your greetings and mat and layer them. in these cards I have used the oval nesties, Day 2.Once all the back grounds are dry trim them to size and build your cards  adding ribbons and wire through the main layer before attaching to the cards. these were trimmed to fit 6x6 cards stock... The inserts were created on the PC and ready to print, trim to size and the fit inside card,

the products used

Penny Black Letters and Flowers stamp code 4035K Cards 1,2,and 3
Penny black Flying stars code 3636K   Cards 4- 8
Penny black Mixed Media 4037K  Cards 9,10
My leaf flourishes, Hearts and swirls, Blossom,Swirl flourishes and Brocade stencils,
Gold, Diamond, and Silver Sparkle medium
Black glossy card.
Ribbons and wire
White Gold and silver embossing powders

1

2

3

4

5
6

7

8

9


10


if you need further info on any of my cards  just message me and I will gladly help..


till tommorrow Happy Crafting  Jayne xx