just as a reminder there is another sample card over on imagination blog posted earlier today ..
ok i have thought of 2 hot tips for making your life easier when stencilling.
TOP TIP 1
Always use an antistatic bag to the back of the masked area this will stop it sticking while your working on your projects.
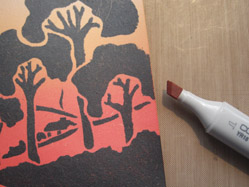
Use a Copic or Pro maker pen on the edges of your stencilled layer, this will help to give you a professional Finish I tend to use the chisel end, so i don't ruin the brush nib.
And this is the card we will finish now....
this is what you'll need to finish the card ,
white 6x6 card
Two brayered then stencilled scenes we have here county road and the village,
two black layers for matting,
Acetate with your owl and tree, Dusk till Dawn
Border punch of your choice,
Double sided tape..

Matt and layer as shown the right side of the card and attach the border on the right hand side.Trim to fit
Do the same for the left side but attach the Acetate under the border on the left hand side.
This is what it will look like flat,
Now as i've worked through this blog hop i have some bit left over i would like to use so ..let me show you how we can do the Snow scene sample, the stencils used may be different but the end result ..Whow really cool....This what you need
using all the extras up plus a picket fence, a white sparkle card base one for each side diamond glitter medium, fluffy stuff ( yes it's called that ) when you heat it puffs up to look like snow ...Also this time i had an extra gold owl on a tree so we will use this too..
Set out your acetate owl and tree like this , trim to fit the height of the card when standing.I have added some white paint and diamond sparkle medium to the fence and then attached it across the bottom,of the acetate, trim to fit,
This is the acetate attached under the border on the right side this time.
When you stand the card up and tuck the acetate under the left border .as shown below..
And it looks like this when standing....
Well what can i say that's all folks .....for this time anyway .I will post this picture on the Imagination Blog very soon www.imaginationcrafts.co.uk and don't forget if you are coming to any of the shows we are at, pop along and see us we will have these samples on stand, and we would love to meet you ...
Thanks to those who followed along I would love to stay and play but ...Mr post man brought me the Brand New Summer Decoupage stamp sets, today and i have to go and play...urmm that might be a good idea for next month's Blog hop,
As we are going to be away for the first 3 weeks of March...SECC Harrogate.and NEC the NEXT Blog Hop will be after that but I will let you all know soon
See you soon have fun Jayne x


No comments:
Post a Comment